
Print file preparation separates amateur designs from professional output. A single oversight can transform a crisp concept into a costly reprint or a project plagued by delays. Whether you're preparing files in Adobe Creative Cloud, Affinity Designer, or other production software, these seven mistakes continue to surface across the industry. Understanding how to identify and correct them saves time, money, and professional reputation.
1. Missing or Incorrectly Set Bleeds
Bleeds extend your design beyond the final trim line. When printers cut stacks of paper, mechanical tolerances create slight variations. Without bleeds, these variations produce white slivers along edges where color should reach the boundary.
Standard bleed requirements measure 0.125 inches (3mm) on all sides. In Adobe InDesign, configure bleeds during document creation in the "New Document" dialog. For existing files, access Document Setup under the File menu. Illustrator users should set bleeds in the artboard panel or during PDF export. Affinity Publisher and Designer include bleed settings in the document setup panel.

Always verify bleed settings before exporting. Open your PDF in Adobe Acrobat Pro and enable "Show Art Box" in preferences. This displays whether design elements properly extend into the bleed zone. If you're working with a RIP (Raster Image Processor) workflow, confirm that the RIP software preserves bleeds during processing rather than cropping them during file interpretation.
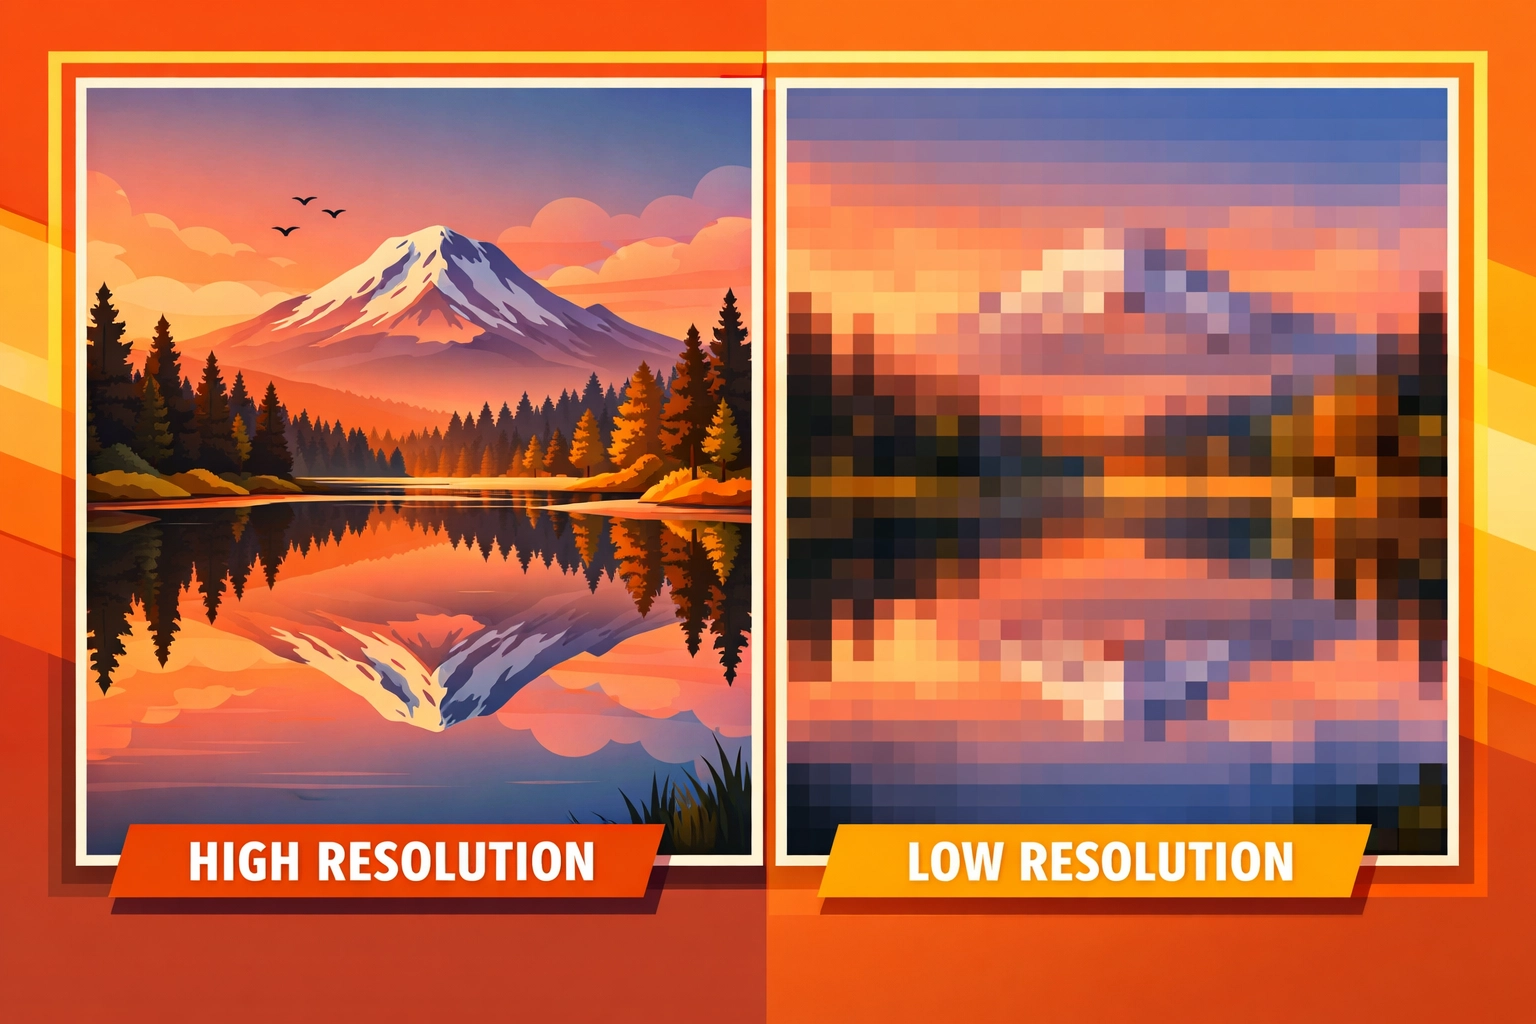
2. Low-Resolution Images
Resolution determines print quality. Web graphics typically exist at 72 DPI because screens don't require higher resolution. Printers need 300 DPI at final output size for sharp results.
Upscaling low-resolution images in Photoshop or other software cannot recover lost detail. The "Image Size" dialog shows current resolution. If an image measures 6 inches wide at 72 DPI, it will only produce acceptable quality at 1.44 inches wide when printed (6 x 72 / 300 = 1.44). Attempting to print it larger creates visible pixelation.
The solution requires sourcing or creating images at proper resolution from the start. Stock photography sites offer high-resolution options. When scanning physical materials, set scanner resolution to 300 DPI or higher. Photographers should deliver files sized appropriately for intended print dimensions. For DTG (Direct to Garment) or DTF (Direct to Film) printing applications, resolution requirements remain identical despite different substrate materials.
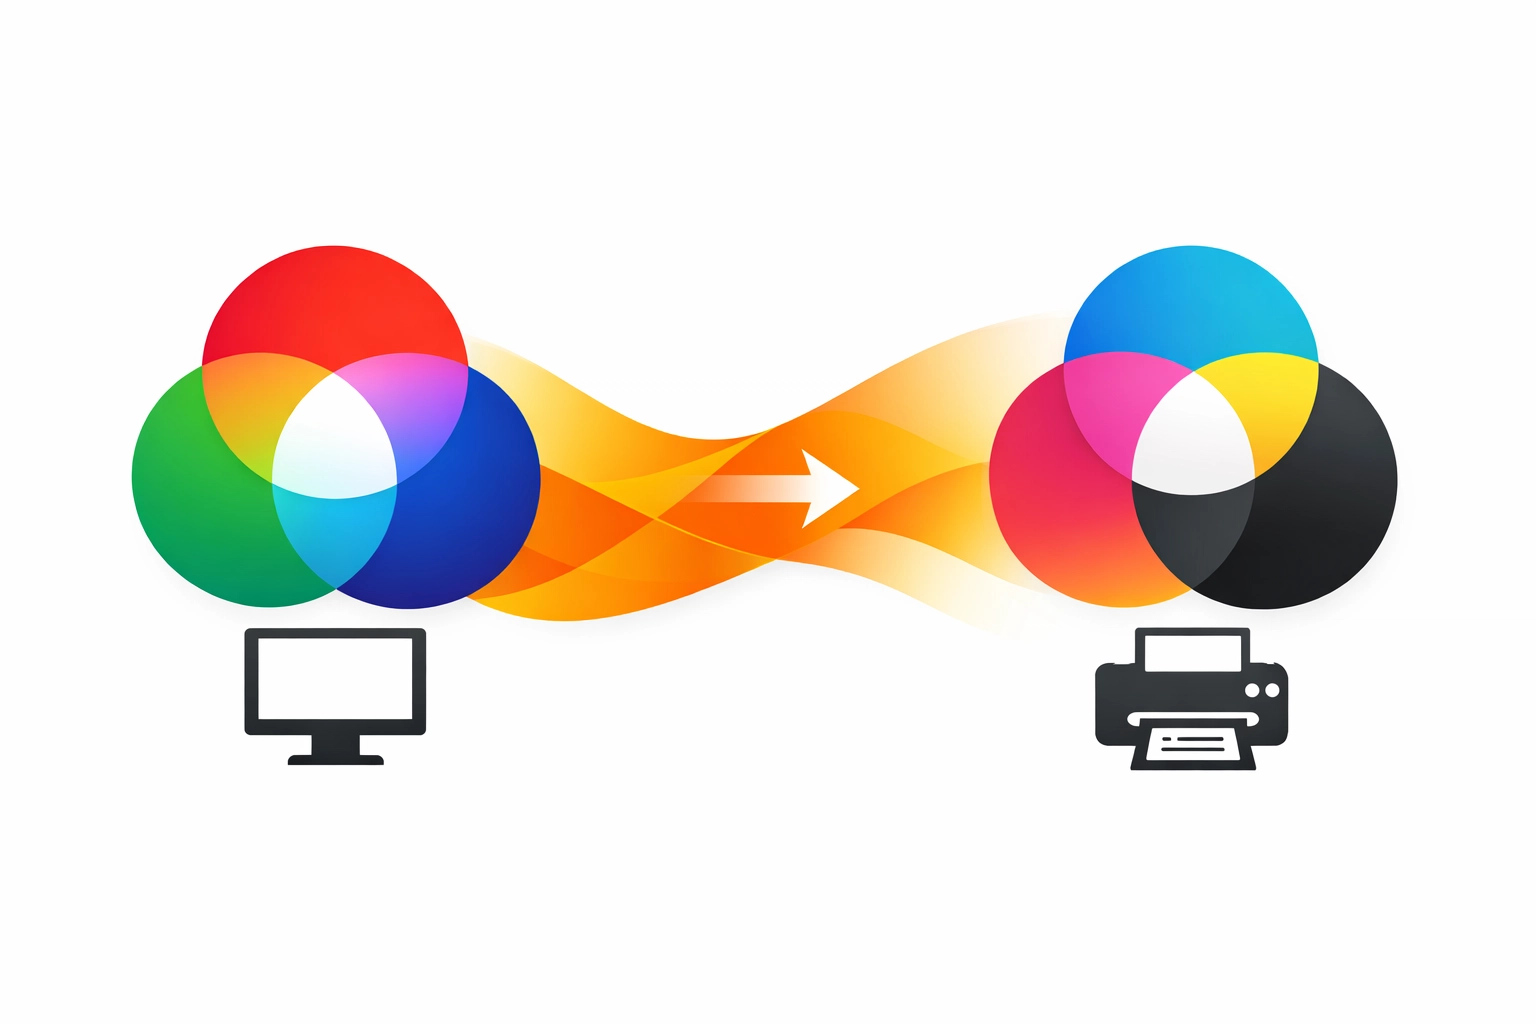
3. RGB Color Mode Instead of CMYK
Your monitor displays color using RGB (Red, Green, Blue) light emission. Commercial printing uses CMYK (Cyan, Magenta, Yellow, Black) ink or toner. The color gamuts differ significantly. Vibrant blues and greens achievable in RGB often cannot be reproduced in CMYK, resulting in muddy or shifted colors.
Convert files to CMYK before submission. In Adobe applications, access Edit > Color Settings to configure color management. Choose "Convert to Profile" under Edit > Color Settings to switch from RGB to CMYK. Select the appropriate CMYK profile based on your printing method and substrate. Coated stock uses different profiles than uncoated paper.
Affinity Designer and Photo handle conversion through the Document menu. When working with sublimation printing, remember that RGB files sometimes perform better due to the dye-based color process, but verify requirements with your specific equipment and RIP software. CorelDRAW users access color management through Tools > Color Management.
For critical color matching, consider specifying Pantone spot colors rather than process colors. Spot colors print as premixed inks rather than CMYK combinations, ensuring consistent results across different printers and substrates.
4. Unoutlined or Unembedded Fonts
Typography causes frequent production delays. When a printer opens your file without access to your specific fonts, software substitutes default alternatives. Your carefully chosen typeface becomes Arial or Times New Roman.
Adobe Illustrator users should outline text through Type > Create Outlines. This converts letters into vector shapes, eliminating font dependencies. The tradeoff is that outlined text cannot be edited as type anymore, so save a working copy with live text before outlining.
InDesign and other page layout applications should embed fonts in PDFs during export. In the PDF export dialog, check font embedding options. "Subset fonts when percent of characters used is less than" should be set to 100% to ensure complete font inclusion. Affinity Publisher includes font embedding in its PDF export preset options.
When sending native application files rather than PDFs, package all fonts with the document. InDesign's Package function (File > Package) collects fonts and linked images into a single folder for delivery.
5. Incorrect Color Space or Profile Assignment
Beyond basic RGB versus CMYK conversion, profile assignment affects color accuracy. Different CMYK profiles exist for various printing conditions. U.S. Web Coated (SWOP) v2 serves as a general standard, but GRACoL 2006 provides improved accuracy for modern offset presses.
Digital printing equipment often requires device-specific profiles. DTG printers may use proprietary color profiles optimized for fabric substrates. Sublimation printers work with specific profiles calibrated for polyester and polymer-coated surfaces. Check with your print provider for their preferred working space.
In Photoshop, assign profiles through Edit > Assign Profile. Converting profiles (Edit > Convert to Profile) changes color values to match the new space. Assignment merely tags the file without altering numbers. Understanding this distinction prevents unintended color shifts.
RIP software often handles final color management during output, but providing properly profiled files ensures predictable results. When sending files to wide-format or production digital presses, confirm whether the RIP expects RGB or CMYK input and which specific profiles the workflow uses.
6. Inadequate Preflight Checking
Preflight identifies problems before they reach production. Adobe Acrobat Pro includes preflight tools under Print Production. These automated checks verify resolution, color mode, font embedding, and other technical requirements.
Create custom preflight profiles matching your printer's specifications. Many commercial printers provide preflight profiles for download. Import these into Acrobat to check files against exact production requirements. The preflight report highlights issues requiring correction.
InDesign offers built-in preflight accessed through Window > Output > Preflight. Configure profiles to check document compliance with print specifications. Live preflight continuously monitors your document, displaying errors in real-time as you work.
For production environments, consider dedicated preflight software like Enfocus PitStop Pro or callas pdfToolbox. These applications offer advanced correction capabilities beyond basic Adobe tools. They can automatically fix common issues like converting colors, outlining fonts, and adding bleeds.
7. Inappropriate Application Selection
PowerPoint, Word, and Excel create screen-optimized documents. They lack precision controls for bleeds, color management, and professional typography. Complex layouts in these applications often shift unexpectedly during PDF creation.

Use Adobe InDesign, QuarkXPress, or Affinity Publisher for multi-page documents requiring precision. These page layout applications provide complete control over bleeds, margins, color management, and typography. They handle professional print workflows including crop marks, registration marks, and color bars.
Adobe Illustrator or Affinity Designer work well for single-page designs, posters, and packaging dielines. Their vector-based approach ensures scalability and precision.
When you must work from office software files, request the highest quality PDF export possible. Enable all quality settings, embed fonts, and use the highest resolution for images. Better yet, recreate the design in professional software using the original as a reference. This investment prevents quality compromises and production issues.
For specialized applications like DTF or sublimation printing, many operators use dedicated RIP software (Ergosoft, SAi, Wasatch) that can compensate for some file deficiencies. However, starting with properly prepared files always produces superior results regardless of downstream processing capabilities.
Works Cited
Adobe Inc. "Adobe Acrobat Pro DC User Guide." Adobe, 2024.
Adobe Inc. "InDesign CC Help and Tutorials." Adobe Creative Cloud, 2024.
International Digital Enterprise Alliance. "GRACoL 2006 Coated Characterization Data." IDEAlliance, 2006.
PrintingForLess.com. "Print File Preparation Guide: Common Mistakes and Solutions." PrintingForLess, 2023.
Serif Ltd. "Affinity Publisher User Guide." Serif, 2024.
Specialty Graphic Imaging Association. "Digital Printing Technical Reference." SGIA, 2023.
Recent Comments