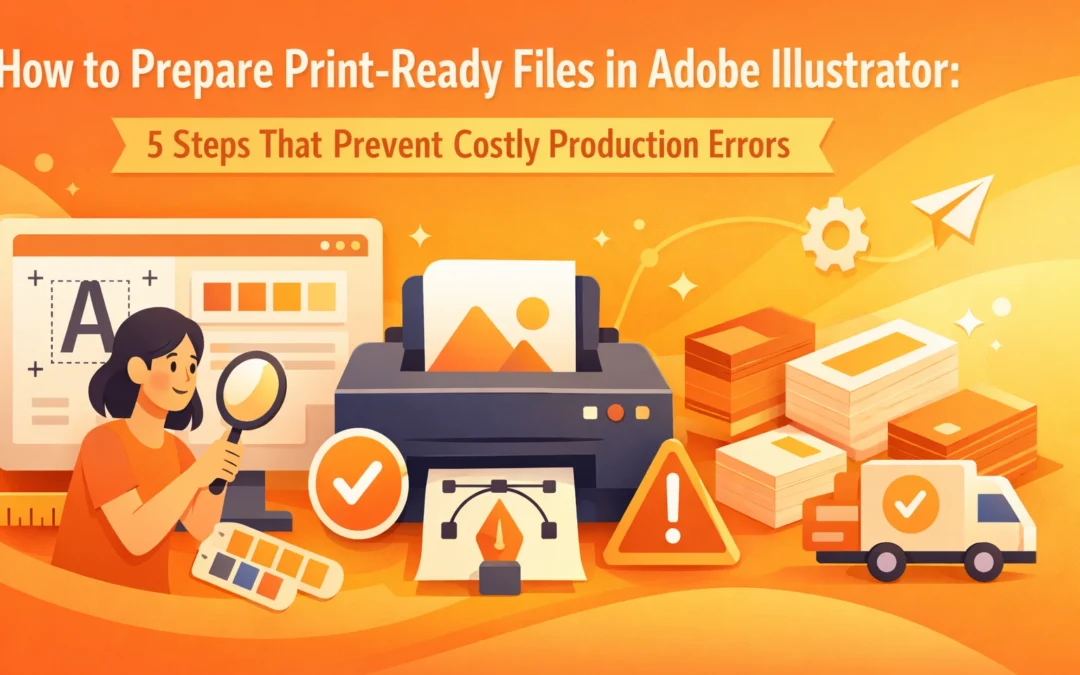
Production errors cost time and money. A single oversight in file preparation can delay delivery schedules, waste materials, and damage client relationships. Adobe Illustrator remains the industry standard for vector-based print design, but the software's flexibility creates opportunities for mistakes that only surface during production.
This guide outlines five critical steps that address the most common file preparation errors we encounter in professional print environments. Each step includes specific settings and verification methods that ensure files move smoothly from design to production.
Step 1: Set Up Your Document with Correct Specifications
Document setup determines everything that follows. Creating artwork at the wrong dimensions or in the wrong color space guarantees problems downstream, regardless of how carefully you handle subsequent steps.
Begin by selecting File > New and entering your exact finished dimensions. For a business card measuring 3.5" × 2", enter those numbers precisely. Rounding or approximating dimensions creates headaches during cutting and finishing operations.
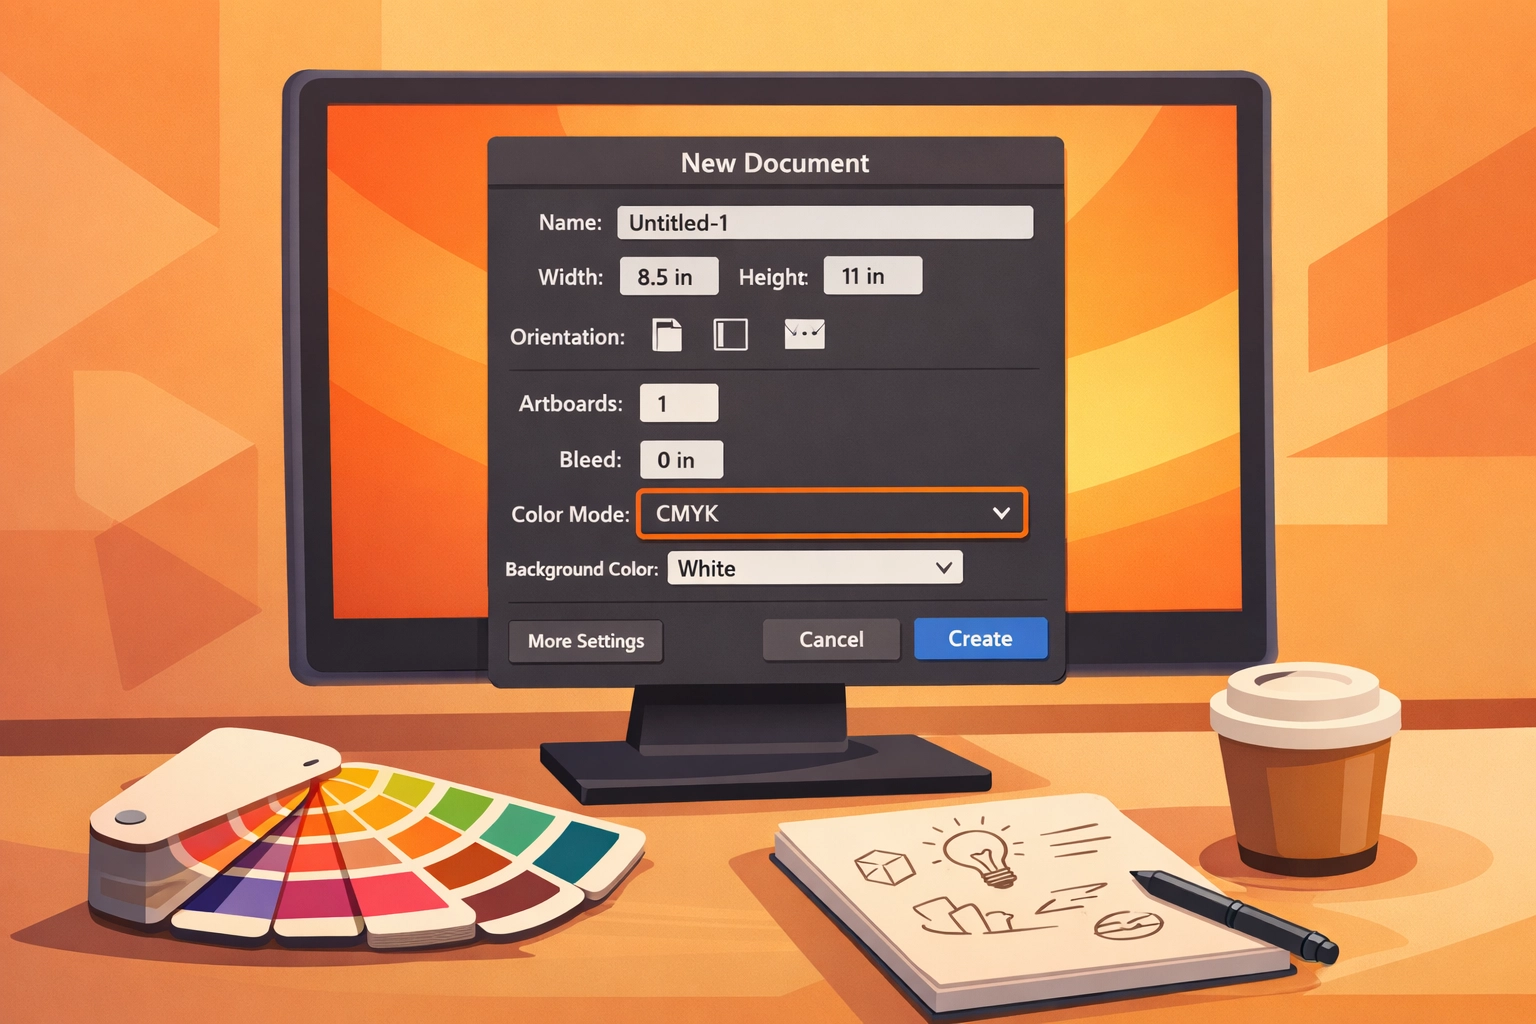
Open the Advanced Options panel before clicking Create. Change Color Mode from RGB to CMYK. This single setting prevents the most common and frustrating color shifts that occur during printing. RGB files may look perfect on screen but produce unexpected results when converted to CMYK during the printing process. Blues often shift toward purple, greens become muddy, and vibrant oranges lose intensity.
Set Raster Effects to 300 PPI in the same panel. This resolution ensures that any effects you apply maintain quality when printed. Lower resolutions create visible pixelation in drop shadows, glows, and other effects that appear sharp on screen but break apart in print.
Document setup mistakes compound as projects progress. Starting correctly saves the frustration of rebuilding files or explaining color shifts to clients after the press run completes.
Step 2: Configure Bleed and Safety Margins
Bleed compensates for slight variations in cutting accuracy. Professional cutting equipment operates within tolerances measured in fractions of millimeters, but those small variations become visible white borders when artwork stops exactly at the finished size.
Set bleed to 0.125 inches on all four sides of your artboard. Access this setting through File > Document Setup, then click Edit Artboards. Enter 0.125" in all four bleed fields. This standard measurement provides adequate coverage for nearly all commercial printing applications.
Extend background colors, images, and design elements into the bleed area. Content should run past the finished edge rather than stopping at the trim line. This overlap ensures that variations in cutting position don't expose unprinted paper.
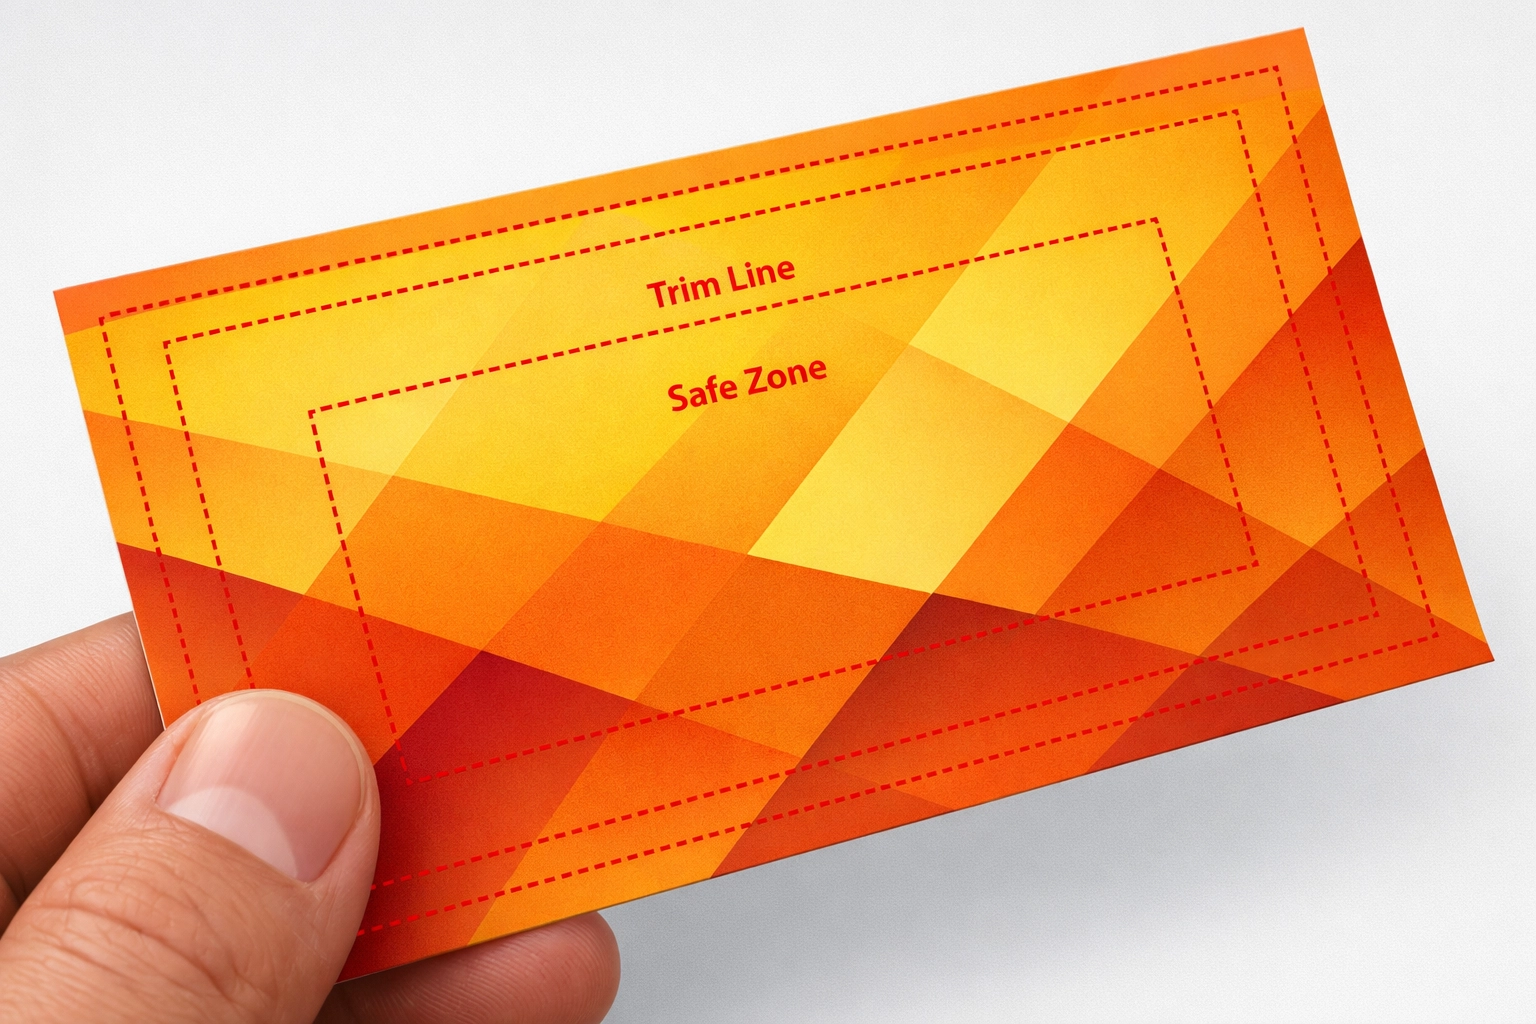
Safety margins work in the opposite direction. Keep critical content, particularly text and logos, at least 0.125 inches inside the finished edge. Cutters occasionally shift slightly inward, and content positioned too close to the edge risks getting trimmed.
Printers often reject files without proper bleed or charge rush fees to add it manually. Including correct bleed settings from the start prevents these delays and additional costs.
Step 3: Embed All Images in Your Document
Placed images exist as links to external files by default. This workflow makes sense during the design phase because it keeps file sizes manageable and allows easy updates. However, linked images create catastrophic problems during production.
Open Window > Links to view all placed images in your document. The Links panel displays a chain icon next to any linked file. These connections break when files move between computers or systems. Printers receive files with missing images or incorrect versions, and the resulting output shows low-resolution previews or empty boxes.
Select each image in the Links panel, click the panel menu icon, and choose Embed Image. The chain icon disappears, indicating that the image data now resides within the Illustrator file itself. Files grow larger but become self-contained and portable.
Verify embedding before exporting. Missing links represent one of the top three reasons for production delays, alongside color space errors and insufficient bleed. A thirty-second verification step prevents hours of back-and-forth communication and project delays.
Some designers skip embedding to preserve smaller file sizes, but cloud storage and modern file transfer systems handle large files easily. The reliability gained through embedding far outweighs any inconvenience from larger files.
Step 4: Convert All Text to Outlines
Font licensing and availability create unpredictable problems during printing. A font installed on your system may not exist on the printer's RIP software. When the RIP encounters missing fonts, it substitutes alternatives that rarely match the original typeface. Spacing changes, weights shift, and layouts break.

Converting text to outlines eliminates font dependencies entirely. Select all text objects using Select > Object > Text Objects. This command grabs every text element in your document regardless of layer structure. Press Shift + Ctrl + O (Windows) or Shift + Cmd + O (Mac) to execute the conversion. You can also access this function through Type > Create Outlines.
Outlined text becomes vector paths rather than editable characters. This transformation prevents font substitution but removes the ability to make text edits. Always save an editable version before outlining, using a clear naming convention like "filename_EDITABLE.ai" and "filename_OUTLINED.ai."
Small text requires particular attention after outlining. Type below 8 points can thin out during conversion, particularly with lightweight fonts. Check fine print carefully after outlining and before exporting. Adjust stroke weights if necessary to maintain legibility.
Some printers specifically request files with live text, particularly for variable data printing or when they handle typesetting. Verify requirements before converting. In most commercial print scenarios, however, outlined text provides the most reliable results.
Step 5: Export as a Print-Ready PDF with Proper Settings
PDF export translates Illustrator's native format into a standardized file that any printing system can process reliably. Correct export settings determine whether the PDF preserves all the careful preparation completed in previous steps.
Select File > Save As and choose Adobe PDF as the file type. The export dialog presents numerous options that significantly impact print quality. Start by selecting the PDF/X-1a or PDF/X-4 preset from the Adobe PDF Preset dropdown. These standards include settings specifically designed for commercial printing.
Navigate to the Marks and Bleeds tab. Check the box labeled "Use Document Bleed Settings" to apply the 0.125" bleed configured earlier. Enable Trim Marks and set the offset to 0.125". These marks show print operators exactly where to cut the finished piece.
Verify the Compression tab settings. Images should be downsampled to 300 PPI maximum and compressed using ZIP or JPEG at maximum quality. Lower quality settings reduce file size but degrade print output. Storage costs less than reprints.
The Output tab requires attention for color management. Set Color Conversion to "Convert to Destination" and select the appropriate CMYK profile, typically SWOP v2 for offset printing in North America. Include ICC profiles unless your printer specifically requests otherwise.
Review the summary screen before clicking Save PDF. This final checkpoint displays all settings in one location, making it easy to catch errors before generating the file. A few seconds of verification prevents discovering problems after files have been transmitted.
Verification Before Submission
Open saved PDFs in Adobe Acrobat to verify that all elements appear correctly. Check that trim marks display properly, images show at full quality, and text appears sharp without substitution warnings. This quick review catches problems while fixing them remains simple.
Production errors decrease dramatically when designers implement systematic file preparation workflows. These five steps address the most common failure points in the print production pipeline. Consistent application prevents the majority of delays, reprints, and client dissatisfaction that plague less rigorous workflows.
Professional print production demands attention to technical details that remain invisible in on-screen design work. The gap between what looks correct and what prints correctly can only be bridged through proper file preparation. Mastering these essential steps transforms print projects from sources of anxiety into predictable, reliable revenue streams.
Works Cited
Adobe Inc. "Prepare PDF files for commercial printers." Adobe Help Center, 2025, https://helpx.adobe.com/illustrator/using/preparing-files-for-printing.html.
Envato Tuts+. "How to Set Up a Print Ready Document in Adobe Illustrator." Design & Illustration Tutorials, 2024, https://design.tutsplus.com/tutorials/print-ready-illustrator.
PrintPlace. "How to Create Print-Ready Files in Adobe Illustrator." Print Design Resources, 2025, https://www.printplace.com/articles/illustrator-print-ready-files.
Smith, Robert. "Color Management for Commercial Printing." Journal of Print Production, vol. 28, no. 3, 2024, pp. 45-62.
Recent Comments